Significant dynamic loads on aircraft wheel rims during takeoff and landing have compelled aircraft wheel manufacturers to introduce mandatory non-destructive testing of aircraft wheels for maintenance and repair companies.
Eddy current Aircraft Wheel Inspection System SMARTSCAN
-
Introduction
Significant dynamic loads on aircraft wheel rims during takeoff and landing have compelled aircraft wheel manufacturers to introduce mandatory non-destructive testing of aircraft wheels for maintenance and repair companies.
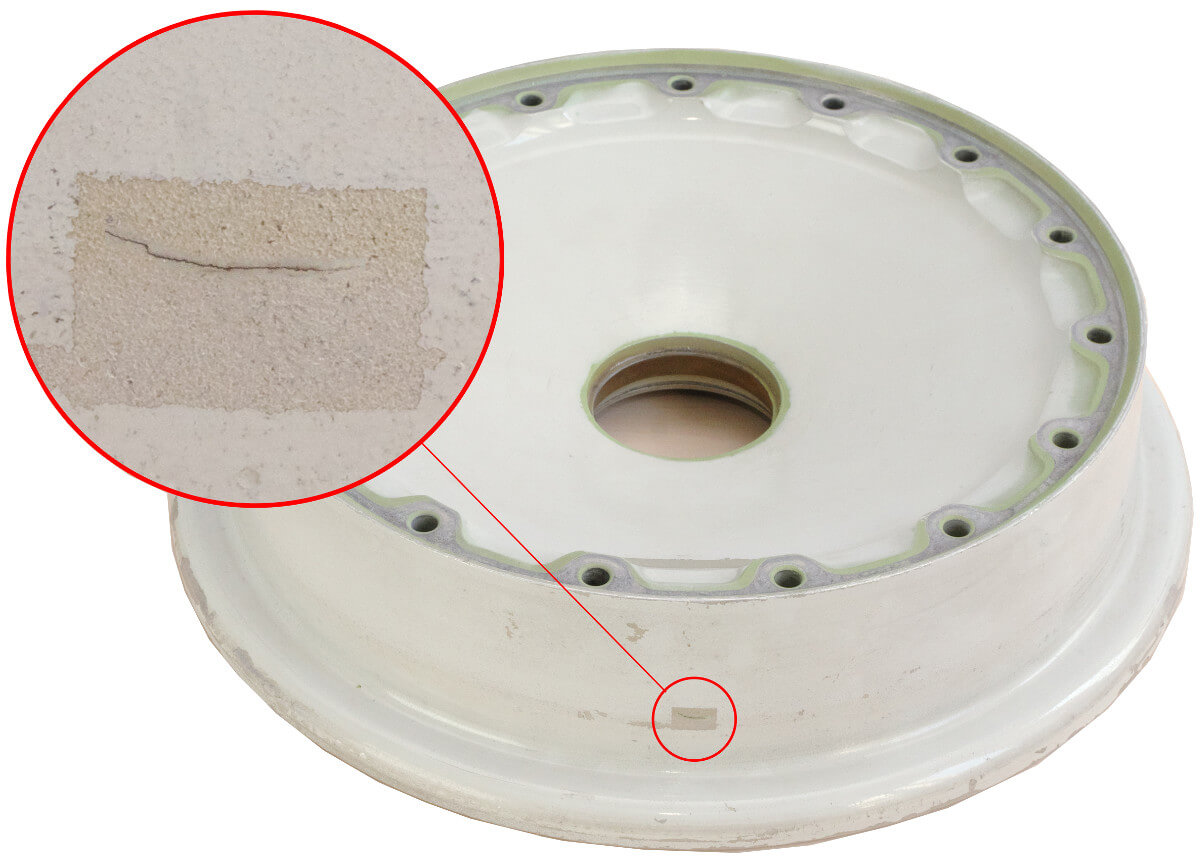
The critical area in aircraft wheel testing is the inspection of the area where the wheel half flange is connected with the cylindrical surface as cracks in the cylindrical surface may only cause wheel depressurization and tyre flattening while cracks in the area of radial transition between the flange and the cylindrical surface may lead to flange destruction with its parts hitting the aircraft engine.
Major methods of non-destructive testing for surface breaking flaws used in wheel repair facilities are liquid penetrant inspection and eddy-current testing.


Eddy-current testing (ECT) is employed in most inspection works since wheels can be tested without removal of paint and varnish whereas the liquid penetrant method is applied only if the surface is free of coating.
Requirements of aircraft wheel manufacturers for eddy-current testing are set out in documentary standards regulating manual as well as automated inspection procedures.
Manual inspection requires precise marking of the wheel surface in accordance with the area covered by the eddy-current probe (ECP) and carefulness of the NDT inspector who has to perform routine operations during a long period of time.
Modern servo motors and controllers have simplified NDT inspector’s work and allowed creating unique automated and semi-automated systems which enable inspection of the sinuous profile of the aircraft wheel with fixed inspection helix in one revolution, and as a result they maximize output and inspection reliability.
The article describes SMARTSCAN, a system of suchlike type, developed and produced by OKOndt GROUP™
SMARTSCAN allows to inspect aircraft main and nose wheels from 7.5 to 35 in. (from 190 to 900 mm) diameter by such world class manufacturers as Messier – Bugatti, Goodrich, Honeywell, Maggitt and others using eddy-current technique.
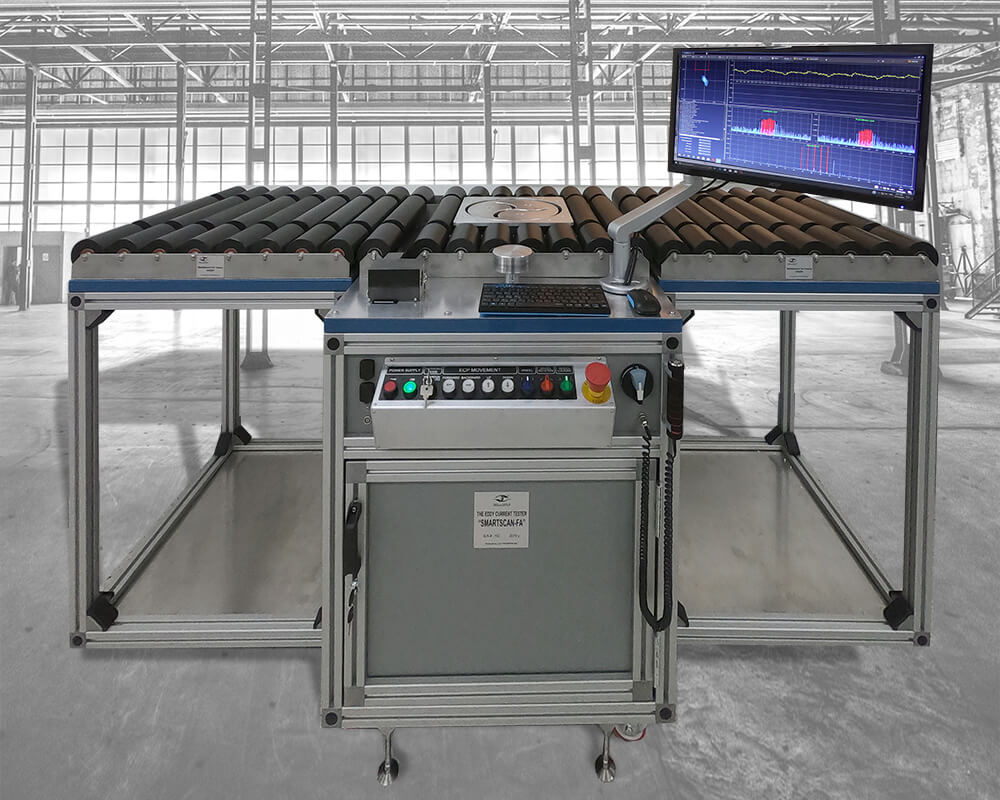
The System consists of the following components (assemblies):
- Table (frame) with a tray for wheels;
- Wheel hub grip mechanism;
- Wheel lifting / lowering mechanism;
- Wheel rotating mechanism;
- Mechanism for ECP movement in horizontal and vertical planes;
- Support for the reference block;
- Eddycon C flaw detector stand;
- System control panel.


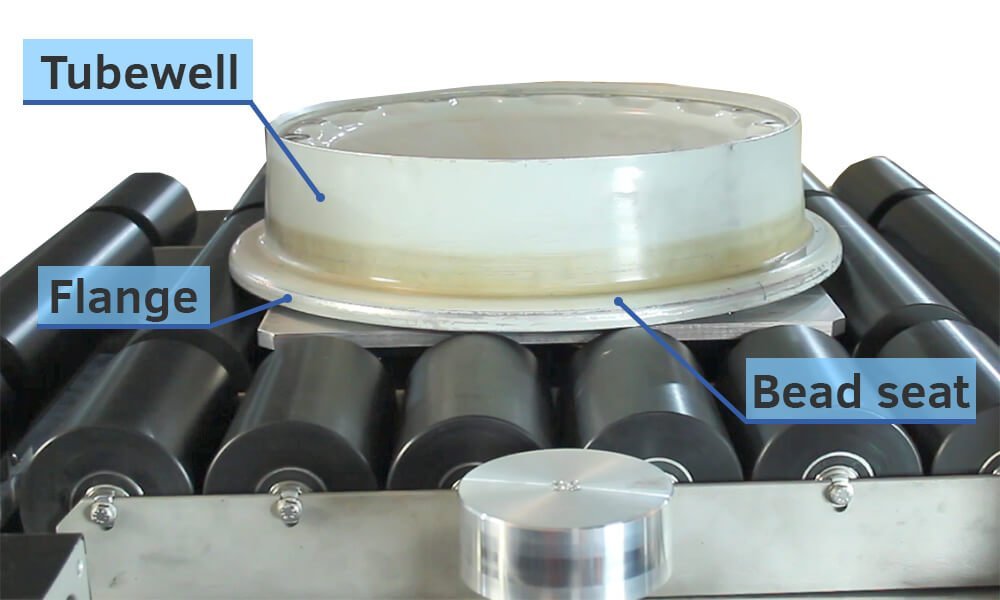
Smartscan ensures inspection of the following areas:
- tubewell;
- bead seat;
- flange.
The System is produced in two versions:
- Model SMARTSCAN enables semi-automated inspection of wheels with portable eddy current flaw detectors of different manufacturers. The SMARTSCAN kit includes Eddycon C flaw detector.
- Model SMARTSCAN-FA enables fully automated cycle of inspection with stop on defect mode, storage of inspection results and database creation, as well as printouts of inspection reports, etc. Eddycon D flaw detector is delivered in the SMARTSCAN-FA kit.
Various versions of the system for aircraft wheel inspection allow wheel shops to select the most suitable kit for their needs to maximize output and automate recording of inspection results.
Reports of wheel inspection may be crucial as a proof of performed wheel inspection and its results.
SMARTSCAN Aircraft Wheel Inspection System
Explore MoreSmartscan System Benefits:
- A unique algorithm of ECP “sticking” to the inspected surface, i.e. tracking the wheel profile even in case of vertical and horizontal wheel shifts;
- Wheel inspection in the “flange up” and “flange down” positions;
- Reliable wheel centering for heavy weight wheels;
- Adapters for inspection of wheels without a hub with a driven nipple (upon request);
- A remote “Pause” button allowing to stop testing and perform a manual confirmatory testing procedure;
- Lockups which stop excessive force used in bringing the ECP movement mechanism to prevent an operator’s injuries and mechanical damage of the ECP.
-
System Features:
- The System is controlled from the operator’s control panel as well as from the special purpose software interface;
- Quick manual bringing of the ECP to an inspected wheel to determine the settings (wheel lifting height, coordinates of ECP progression for inspection start and completion);
- Automated ECP performance validation by scanning the reference block before inspection and on its completion;
- Adjustability of the inspection helix from .004 to .08 in. (from 0.1 to 2 mm) as well as of wheel rotation speed;
- Wheel hub grip mechanism allows to center aircraft wheels weighing up to 330lbs (150 kg) in the inspection position and rotate them at a speed of 150 rpm;
- Manual and automatic stop on defect;
- Return to defect function;
- Ethernet connection;
- Saving inspection results to the Eddycon C memory (SMARTSCAN) or PC (SMARTSCAN-FA);
- The System software ensures individual inspection setup and saving settings for all the inspected wheels for future use;
- Due to high-quality components and modularity of the System, its repair takes minimum time;
- Automated process allows inspecting wheel halves with increased output in comparison with manual inspection and still ensuring the area of inspection is 100% scanned;
- Ease of use.
-
SMARTSCAN System Specifications
| Model | SmartScan | SmartScan-FA |
| System type | Semi-automated | Automated |
| Overall dimensions | 29 x 39 x 49 (in.)* 750 × 990 × 1250 (mm)* |
47 x 31 x 39 (in.)* 1200 × 800 × 1000 (mm)* |
| Weight | No more than 1102 lbs (500 kg) | No more than 772 lbs (350 kg) |
| Flaw detector | Eddycon C | Eddycon D |
| ECP type |
Pencil probe type with a cylindrical head. Frequency — 100 kHz, 200 kHz, 500 kHz ECP diameter – 15/64" (6 mm) Other standard ECP types – on request |
Pencil probe type with a cylindrical head. Frequency — 100 kHz, 200 kHz, 500 kHz ECP diameter – 15/64" (6 mm) Other standard ECP types – on request |
| Max wheel diameter | 35 in. (900 mm) | 35 in. (900 mm) |
| Max System load | 330 lbs (150 kg) | 330 lbs (150 kg) |
| Inspection helix | Adjustable from .004 to .08 in. (from 0.1 to 2 mm) | Adjustable from .004 to .08 in. (from 0.1 to 2 mm) |
| Inspection area | Adaptive tracking of the wheel profile surface | Adaptive tracking of the wheel profile surface |
| ECP vertical movement | 17 in. (430 mm) | 17 in. (430 mm) |
| Rotation speed | 10-150 rpm | 10-150 rpm |
| Inspection speed | up to 33 fps (10 m/s) | up to 75 fps (23 m/s) |
| Alarms | Visual and acoustic | Visual and acoustic |
| Power supply | 110-240 V, 50/60 Hz | 110-240 V, 50/60 Hz |
| Data recording and storage |
Yes (Eddycon C memory) |
Yes (PC hard drive, database) |
| Manual inspection |
Yes (set of ECPs for manual inspection) |
Yes (set of ECPs for manual inspection) |
| Remote “Pause” button | Yes | Yes |
| Wheel position | Flange up/Flange down | Flange up/Flange down |
| Automatic reference block calibration | + | + |
| Automatic stop on defect | - | + |
| Turntable | rubber/plastic coated rolls | rubber/plastic coated rolls |
| Control panel | built-in | built-in |
| Operation modes | Block, Manual (with automatic reference block calibration), Automated | Block, Manual (with automatic reference block calibration), Stop on defect, Automated |
| Ports | 3 – USB ports, HDMI or Display port, Ethernet port | 3 – USB ports, HDMI or Display port, Ethernet port |
| PC computer set | Wireless keyboard and mouse, monitor, system unit, special purpose software | Wireless keyboard and mouse, monitor, system unit, special purpose software |
| Adapter set | For wheels without hubs (p/n C20626200 (SAFRAN), p/n 3-1674 (GOODRICH) |
For wheels without hubs (p/n C20626200 (SAFRAN), p/n 3-1674 (GOODRICH) |
*Overall dimensions can be modified upon the customer's request
SMARTSCAN automated systems of eddy current testing enhance output and inspection reliability while minimizing the influence of the human factor.
