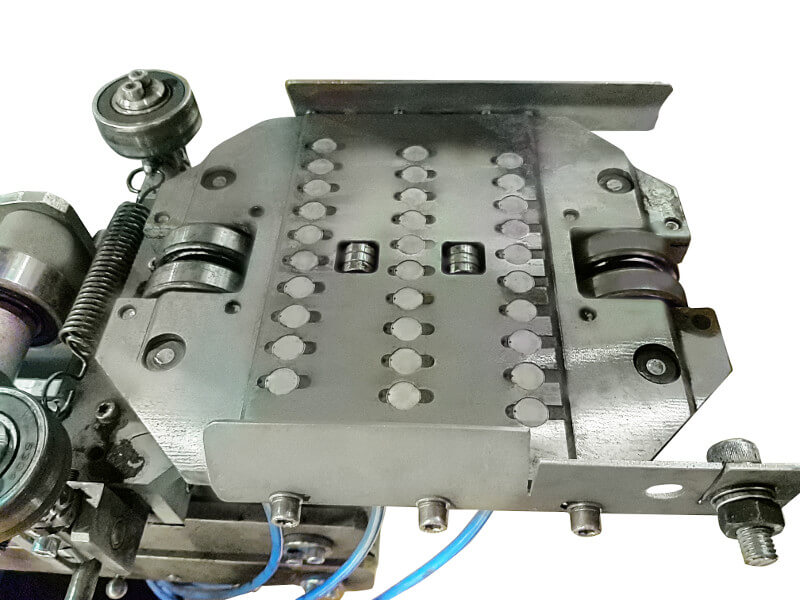
Eddy current testing System of rails EDC RAIL 5065 allows to perform an automated eddy current testing for presence of the surface defects. Main defect types that are subject to testing by the System are the surface defects such as cracks, laps, hairline cracks located on the outer surface of the rail head and rail shoe of 49Е1, 60Е1, UIC60 rail types etc in accordance with EN 13674–1–2017 requirements.
The System represents a modular structure that is composed of three standalone scanners:
- Scanner for the rail head running surface testing
- Scanner for the rail base testing
- Scanner for radial transitions rails lateral faces testing.
Scanner for the rail head running surface testing provides rail head testing in the area of its running surface within ± 24 mm from the vertical axis of the rail.
Scanner for the rail base testing provides testing of the whole rail foot, except for the 5-mm near-edge areas.

Scanner for radial transitions and rail lateral faces testing provides testing of the rail head in the area from upper fillet radius (test area starts at the distance of ± 24 mm from the rail vertical axis) to lateral faces (test area ends at the point of juncture of the rail head lateral face with lower radius).

The scanners of the System can be independently integrated to the Customer’s production line.
All the scanners of the System are equipped with the unique ECP (eddy current probe) matrices suspension structure. The suspension is designed to enable smooth overrun of the ECP matrices onto the rail, therefore minimum dead zones are ensured in the beginning and in the end of the rail, as well as high-output testing at rails speed moving by the production line of up to 1.5 m/s.

During the testing, the ECP matrix operates in a constant contact with the rail surface leaning on the rolling bearing group which ensures a stable gap between the test surface and ECPs’ active faces.
Operating in contact with the rail surface gives a lot of considerable advantages, such as:
- allows to minimize dead zones: up to 200 mm in the beginning of the rail and 100 mm in the end of the rail.
- ECPs operate through the stable air gap. This type of operation brings the ECP sensitivity alternations to zero level during the testing, as well as their mechanical damage by the rail.
Combination of stable operation of the scanners’ mechanics and their computing parts enabled to measure the rail length in the process of testing and to ensure stable repeatability of the artificial defects detection in the Reference Blocks.
In the process of testing, the equipment of the System also provides the marking and displaying of the rail flawed areas with indication by which ECP the defect was detected. Dividing paint-marking of the flawed areas at the rail profile, in turn, allows the quality specialist to quickly and conveniently prove the presence of a defect and perform repair by grinding, or to reject the rail.
